In UO Outlands, the ocean serves as a profitable environment for players who understand how to optimize their ship, crew, and legal status. This UO Outlands guide covers strategies for PvE Ocean Content, including selecting the best ships, Best Template and crew Professions build, and using the Civilian flag to protect ship upgrades. It details maximizing SOS and MiB farming, managing crew, and using skills like Begging for saving Doubloons.
The Best Ships for Gold Making
Choosing between the Medium Ship and the Large Dragonship depends on whether you value speed and lower risk (Medium) or pure combat power and high-end farming capacity (Large Dragonship).
The Medium Ship: for Solo Gold Farming

The Medium Ship is widely considered the best overall ship for consistent, low-risk Solo Gold Farming.
- Speed & Safety: With a speed of 5.556 tiles/sec, it is fast enough to evade most heavy pirate ships (Galleons) while being maneuverable enough to kite sea monsters.
- Optimal Cannon Count: It features 3 cannons per side, providing a significant DPS jump over small ships without the massive reload penalties of much larger vessels.
- Economic Efficiency:
- Registration: Only costs 10,000 Doubloons.
- Upgrade Multiplier: A low 2.0x multiplier means that adding powerful ship upgrades (like “Swift Reload”) is much cheaper than on larger ships.
- The “Gold Sweet Spot”: It is perfect for farming Message in a Bottle (MiB) and Level 1–3 Treasure Maps where you need to move quickly between points.
The Large Dragonship: for Bosses
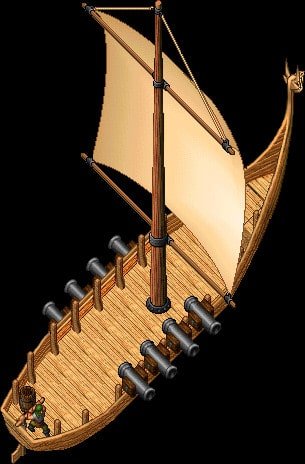
The Large Dragonship is designed for players ready to take on the most dangerous ocean content for maximum gold.
- Firepower: It carries 4 cannons per side, allowing you to sink NPC targets and “Ghost Ships” much faster.
- Enhanced Crew Slots: Crucially, it has 4 crewmember slots (one more than the Medium Ship). This allows you to run the gold making crew build (Fisherman, Engineer, Cook) and add the Carpenter for increased sustainability.
- Durability: With 4,000 Hull HP, it can tank hits that would force a Medium Ship to retreat. This allows you to stay in Fishing Frenzies or high-spawn areas longer.
- Higher Investment/Reward:
- Registration: Costs 50,000 Doubloons.
Hiring Crew: Tricks & Strategies

To recruit a powerful Crew, you can utilize both currency and specialized character skills:
- Recruitment Locations: Find NPC crewmembers in Taverns, Inns, and Docks.
- Hiring Methods: hire them using the Begging Skill.
- Begging Strategy: Using the Begging “Motivation” mechanic increases your crew’s damage by up to 25% for 5 minutes (based on skill level).
- High-Tier Recruitment: At 120 Begging, you gain a 2% chance to recruit Heroic crew and a 1% chance for Legendary crew from town spawns.
- Seafaring Loot: Crewmembers can also be found as loot while exploring the ocean.
- Managing “Junk” Crew: Undesired crewmembers can be converted into Arcane Essence at the Prevalia Exchange.
Best Professions For Gold Making
To maximize Medium Ship gold making (and doubloon yield), your crew selection should focus on increasing loot bonuses, improving combat efficiency to clear targets faster, and enhancing specific resource-gathering skills.
| Profession | Bonuses | Best Strategy |
|---|---|---|
 Fisherman | +Doubloons Earned, +Fishing Effective Skill, +Sails Repair | Essential for “Message in a Bottle” (MiB) farming and fishing frenzies. The direct bonus to doubloon drops increases raw currency from all naval kills. |
 Engineer | -Cannon Reload Time, +Cannon Damage, -Ability Cooldowns | Maximizes “Gold per Hour” by significantly increasing your ship’s DPS. Faster reloads and higher damage allow you to sink NPC ships and clear ocean spawns much quicker. |
 Cook | +Crew Damage, +Crew Hit Points, +Crew Healing | Crucial for Boarding Strategies. Since NPC crew often carry significant doubloons on their corpses, a buffed crew ensures you win boarding actions without losing your own valuable leveled NPCs. |
For Large Dragonship, which have higher crew capacities, the recommended fourth profession to maximize both your gold and ship survivability is the Carpenter.
While the previous three focused on looting and raw damage, the Carpenter ensures your expensive, high-tier ship stays afloat and operational during high-profit (but dangerous) encounters.
| Profession | Bonuses | Why It’s Best for Large Ships |
|---|---|---|
 Carpenter | -Repair Cooldown, +Hull Repair Amount, +Hull Max Hits | Damage Mitigation: Large ships are massive targets. A Carpenter significantly reduces the downtime between repairs. |
| Maintenance Ability | Passive Sustenance: Automatically repairs randomized ship damage (Hull, Sails, or Guns) every 30–60 seconds, saving you resources and gold in long fights. |
Management Tips
Sorting Scripts: use Razor Scripting to automatically sort crewmembers by class (e.g., Gunner, Marine) or rarity (e.g., Master, Legendary) in their containers.
Loyalty Leveling: Crew gain Loyalty Experience over time. You can spend Pirate Booty to upgrade their level (up to level 10), which increases their base bonuses by up to 150%.
Crew Maintenance: Use the Ship Crewmember Hotbar to track health and cast Cure or Greater Heal directly on your NPCs during combat.
Docking to Swap: You can only add or remove crewmembers while the ship is in Deed form or Docked.
The Flagging Strategy
The Flagging Strategy is a core mechanic that allows you to choose between safety and maximum profit. While “Pirate” is the default setting, flagging as a Civilian is the primary strategy for players focused on building their wealth without risking their expensive ship equipment.
The Civilian Flag Strategy
The Civilian flag acts as a “beginner-friendly” or “safe-farming” mode. It is designed to let you get established in ocean content with significantly reduced risk.
- Insurance for Upgrades: While flagged as a Civilian, you cannot lose your Ship Upgrade Deeds to other players if your ship is sunk. Normally, pirates can “ransom” or loot these valuable deeds, which can be worth millions of gold.
- Reduced Aggression: You are treated as a “Blue” player. If another player initiates an attack on your Civilian ship, they become Criminal, making them a legal target for the Navy and other “Anti-PK” players.
- Automatic Reversion: If you initiate an attack on another player while in Civilian mode, your flag immediately reverts to Pirate, and you lose your protections.
Why You Should Flag as Civilian
Despite the safety, there are heavy economic trade-offs designed to keep the “Pirate” flag attractive for high-end players.
| Benefit of Civilian Flag | Penalty of Civilian Flag |
|---|---|
| Upgrade Protection: Your Ship Upgrades are 100% safe from looting. | -25% Gold & Doubloons: You earn significantly less raw currency from all kills. |
| Lower Risk: Ideal for leveling up new crewmembers or testing new ships. | lower Rare Loot Chance: You are less likely to find special items or new Upgrade Deeds. |
| Peaceful Farming: NPC Navy ships will not attack you unless you turn criminal. | No Ransoms: You cannot acquire other players’ Upgrade Deeds by sinking them. |
The Pirate Flag: High Risk, High Reward
Flagging as a Pirate (the default) removes all loot penalties. You earn 100% of gold and doubloons and have the full chance to find rare drops. However, you are “open season”—any player can attack you without penalty, and if you are sunk, your high-value ship upgrades can be lost or ransomed back to you for a massive doubloon fee.
Strategic Recommendation
- Use Civilian until your crewmembers reach Level 5-10 and you have learned how to maneuver your ship effectively.
- Switch to Pirate only when you are part of a fleet or are confident enough in your Large Dragonship setup to defend your upgrades against attackers.
The Best Boating Template

boating build are unique because the ocean requires templates that can handle “pulling” monsters from the water while simultaneously managing ship combat.
100 Magery
120 Cartography
100 Spirit Speak
100 Focus
80 Medetation
120 Fishing
100 Tactics
Message in a Bottle (MiB/SOS) Farming
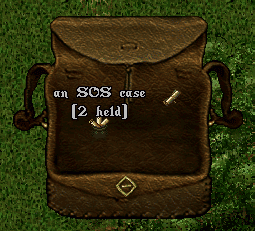
Message in a Bottle (MiB) and the resulting SOS Messages are a cornerstone of naval gold making. Unlike standard fishing, these are “ocean treasure maps” that provide high-value loot and rare decorations.
- Skill Synergy (120 Fishing): Higher fishing skill increases your successful retrieval chance. At 120 Fishing, your “Effective Skill” bonus significantly boosts the quality of fish and the chance of spawning rarer creatures from the nets.
- Fishing Net Bonus: Use Leather Fishing Nets to retrieve items. Success chances are boosted by higher Fishing skill, net quality, and ship upgrades.
- The Guaranteed Spawn: Every SOS guarantees at least one creature spawn (and up to three). These monsters are the real gold mine because one will always carry a Salvaged Crate (Small, Medium, or Large) filled with gold, reagents, and rare items.
- Efficient Routing: Stack multiple SOS messages in the same quadrant of the map to minimize travel time. Use a ship with Navigator or Runner upgrades to travel between points faster.
- Ship Upgrades: Equip Explorer or Merchant outfittings. These provide passive bonuses to Fishing Special Chance and Doubloons Earned, which apply directly to the loot you pull up from an SOS.
- Combat Readiness: SOS monsters can be tougher than standard sea spawns and often appear in groups. Ensure your ship has at least a Level 5 Engineer or Cook to handle these sudden “ambushes” without having to retreat.
Final Thoughts
Success in the UO Outlands maritime world is defined by how well you balance efficiency, safety, and investment. While the allure of the high-seas Pirate life offers the highest raw gold multipliers, the true masters of the ocean are those who treat their ship as a business. By starting with a Medium Ship to minimize risk and eventually scaling into a Large Dragonship, you create a platform capable of handling everything from routine MiB farming to high-stakes Ghost Ship encounters.
The “secret sauce” to long-term wealth lies in your crew. Never underestimate the power of a high-loyalty Fisherman and Engineer; their passive bonuses to doubloon yields and reload speeds are the primary drivers of your “Gold per Hour.” When combined with the Civilian Flagging strategy, you can safely level these NPCs and protect your expensive ship upgrades until you are powerful enough to defend yourself against the players.